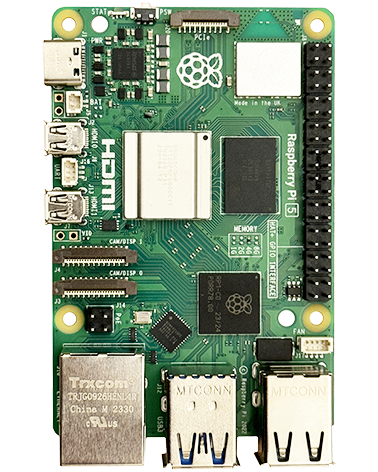
Setting up your RPi as a WiFi access point
http://learn.adafruit.com/setting-up-a-raspberry-pi-as-a-wifi-access-point/overview
Configuring Raspberry Pi 3 WiFi As An Access Point
The below is based on this excellent guide here on the Frillips blog: https://frillip.com/using-your-raspberry-pi-3-as-a-wifi-access-point-with-hostapd/
You should follow that guide, we’ve just duplicated here for our needs in case it ever vanishes.
Installing The Required Packages
hostapd
Let you to use the built in WiFi as an access point.
dnsmasq
A combined DHCP and DNS server that’s easy to configure (less heavyweight than isc-dhcp-server and bind9)
sudo apt-get install dnsmasq hostapdConfiguring Raspbian DHCP
In Raspian interface configuration is handled by dhcpcd. We need to tell it to ignore wlan0, as we will be configuring it with a static IP address elsewhere.
Open up the dhcpcd configuration file:
sudo nano /etc/dhcpcd.confAdd the following to the bottom of the file (but above any interface lines you may have added):
#DISABLE WLAN0 FROM DHCPCD AS WE ARE USING IT AS A WIFI ACCESS POINT
denyinterfaces wlan0
Set WLAN0 static IP Address
Open up the interface configuration file:
sudo nano /etc/network/interfacesEdit the wlan0 section so that it looks like this:
allow-hotplug wlan0
iface wlan0 inet static
    wireless-mode Master
    address 192.168.0.1
    netmask 255.255.255.0
    network 192.168.0.0
    broadcast 192.168.0.255
#    wpa-conf /etc/wpa_supplicant/wpa_supplicant.conf
N.B. Make sure the subnet is different from the subnet you are using on your eth0 connection if you are connecting via SSH, otherwise you’ll loose your connection on eth0!!
Restart dhcpcd and then reload the configuration for wlan0 with:
sudo service dhcpcd restart

sudo ifdown wlan0; sudo ifup wlan0
Configure Hostapd
Create a new configuration file:
sudo nano /etc/hostapd/hostapd.confCopy this into the file:
interface=wlan0

# Use the nl80211 driver with the brcmfmac driver
driver=nl80211

# The name to use for the network
ssid=RPi-AP

# Use the 2.4GHz band
hw_mode=g

# Use channel 6
channel=6

# Enable 802.11n
ieee80211n=1

# Enable WMM
wmm_enabled=1

# Enable 40MHz channels with 20ns guard interval
ht_capab=[HT40][SHORT-GI-20][DSSS_CCK-40]

# Accept all MAC addresses
macaddr_acl=0

# Use WPA authentication
auth_algs=1

# Broadcast the network name
ignore_broadcast_ssid=0

# Use WPA2
wpa=2

# Use a pre-shared key
wpa_key_mgmt=WPA-PSK

# The WPA2 passphrase (password)
wpa_passphrase=raspberry

# Use AES, instead of TKIP
rsn_pairwise=CCMP
Save and exit.
To verify its working by entering this and checking you see network “RPi3-AP”
sudo /usr/sbin/hostapd /etc/hostapd/hostapd.confUse Ctrl+C to stop it.
If you tried connecting to it, you would see some output from the Pi, but you won’t receive an IP address until dnsmasq is set up.
We need to tell hostapd where to look for the config file when it starts up on boot. Open up the default configuration file:
sudo nano /etc/default/hostapdfind the line
#DAEMON_CONF=""and replace it with:
DAEMON_CONF="/etc/hostapd/hostapd.conf"Note: “_CONF”, NOT “#DAEMON_OPTS”!!! REMOVE THE ‘#’ AT THE START OF THE LINE!!!!
Configure DNSMASQ
The default dnsmasq config file contains lots of information on how to use it, but the majority of it is largely redundant for our purposes. So to simplify things we move it and then create a new one:
sudo mv /etc/dnsmasq.conf /etc/dnsmasq.conf.orig
sudo nano /etc/dnsmasq.conf
Copy in the following:
# Use interface wlan0
interface=wlan0

# Explicitly specify the address to listen on
listen-address=192.168.0.1

# Bind to the interface to make sure we aren't sending things elsewhere
bind-interfaces

# Forward DNS requests to Google DNS
server=8.8.8.8

# Don't forward short names
domain-needed

# Never forward addresses in the non-routed address spaces.
bogus-priv

# Assign IP addresses between 192.168.0.5 and 192.168.0.250 with a 12 hour lease time
dhcp-range=192.168.0.5,192.168.0.250,12h
Set Up IPv4 Forwarding
We need to enable packet forwarding. Open up the sysctl.conf file:
sudo nano /etc/sysctl.confRemove the # from the beginning of the line containing:
net.ipv4.ip_forward=1Save and exit. This will enable it on the next reboot. You can activate it immediately with:
sudo sh -c "echo 1 > /proc/sys/net/ipv4/ip_forward"To share our eth0 internet connection to devices connected over WiFi we need to configure a NAT between our wlan0 interface and our eth0 interface. Use the following commands:
sudo iptables -t nat -A POSTROUTING -o eth0 -j MASQUERADE
sudo iptables -A FORWARD -i eth0 -o wlan0 -m state --state RELATED,ESTABLISHED -j ACCEPT
sudo iptables -A FORWARD -i wlan0 -o eth0 -j ACCEPT
We need these rules to be applied every time we reboot so run:
sudo sh -c "iptables-save > /etc/iptables.ipv4.nat"to save the rules to the file /etc/iptables.ipv4.nat. We need to run this after each reboot, so open the rc.local file with:
sudo nano /etc/rc.localJust above the line exit 0, add the following:
# Special for using wlan0 as an access point
iptables-restore < /etc/iptables.ipv4.nat
Start The Services
sudo service hostapd start
sudo service dnsmasq start
You should now see a new WiFi network with SSID “RPi-AP”
Issues Found
WiFi access point DHCP server no longer working
Issue encountered after updating all packages on Raspbian Jesse
Can connect to the WiFi access point but when I look at the IP settings of my computer the DHCP server on the RPi has not functioned and issued correct settings. Using the command “service dnsmasq status” I get this:
● dnsmasq.service - dnsmasq - A lightweight DHCP and caching DNS server
   Loaded: loaded (/lib/systemd/system/dnsmasq.service; enabled)
  Drop-In: /run/systemd/generator/dnsmasq.service.d
           └─50-dnsmasq-$named.conf, 50-insserv.conf-$named.conf
   Active: failed (Result: exit-code) since Wed 2019-05-08 08:28:20 UTC; 11h ago
  Process: 705 ExecStart=/etc/init.d/dnsmasq systemd-exec (code=exited, status=1/FAILURE)
  Process: 657 ExecStartPre=/usr/sbin/dnsmasq --test (code=exited, status=0/SUCCESS)
pi@raspberrypi:~ $
Solution found on this page
https://discourse.pi-hole.net/t/dnsmasq-not-working-after-last-ftl-update/3537/33
is to issue the following command to remove dns-root-data:
sudo apt-get --purge remove dns-root-data

2 years ago
Hi — this is a very handy guide, thank you! Shouldn’t the parameter in hostapd.conf for ht_capab be [HT40+], not [HT40]?